Macaroni Salad (Topinka's Macaroni Salad) - 1980's

Wednesday, November 10, 2010

Macaroni Salad "Topinka's Macaroni Salad"
Macaroni with a slight kick
Bust out your salad with an awesome solo

Everyone has their own version of macaroni salad. There are so many different variations- and if you ask me, they are all delicious!! I guess when you run into a classic recipe like this one, it is easy and enjoyable to change it up a little bit and personalize it.

 As a side note, I recently started taking my mandolin lessons from a new instructor. He wanted me to play a song I knew well, so I played a bluegrass classic, "The Girl I left Behind". I asked him if he played it different, and his response is that everyone plays it different. That when you get to such a classic song, that everyone plays it differently. And that these staple songs are where people put their own style into what they play.  Then I started thinking today, maybe this is that kind of recipes.  Most people who cook know how to make macaroni salad; and most people that make macaroni salad have their own versions. Maybe us as humans, feel a need to express our creativity in that which we find comfort.  I don't know. Maybe that goes too far for my food blog; and I need to stick to my song and recipe. lol.

This recipe is called Topinka's Macaroni Salad.  When I googled it, the powers that be Google said that it was a restaurant in Detroit. So, in honor of my late Grandmother and the late restaurant here is the recipe.

I did change this recipe a little bit. I added shredded carrots. I did this for one reason. My husband Robert's favorite macaroni salad in the entire world is his mother's macaroni salad.  He won't even taste any other macaroni salad.  I don't know if this will work yet, but the carrot might make it appear to look more like his mom's macaroni salad- so he might actually try it, right?? I guess we will have to test this theory out later. :) I also took out the pimentos.  I don't really like pimentos. I have listed them in the recipe below, but I did not use them.

If I had to categorize this macaroni salad and say how it is different from other macaroni salads, I would say that it is that it has Dijon mustard in it. The Dijon gives it a little kick. It is really creamy and has that sound that only creamy macaroni salad can make when you stir it up. You know what I'm talking about.  I hope you all enjoy!

Topinka's Macaroni Salad

1 12 Oz Package of Macaroni
1 Green Pepper
1 Small Onion
1 Small Jar of Pimentos
1 Slice of American Cheese, sliced (more if desired)
3 Tbsp Mayo
1 Tbsp Dijon Mustard
1/2 Cup of Coffee Cream or Milk
Pinch of salt

Prep Time: 15 Minutes
Cook Time: 10 Minutes
Clean Up Time: 10 Minutes

Makes 6 to 10 Servings

1. Cook and drain Macaroni


2. Add chopped Pepper, Onions, and Pimentos. Stir.


3. Stir in Mayo


4. Stir in Mustard and salt


5. Add Cream or Milk.
The more cream or milk, the creamier it will be.
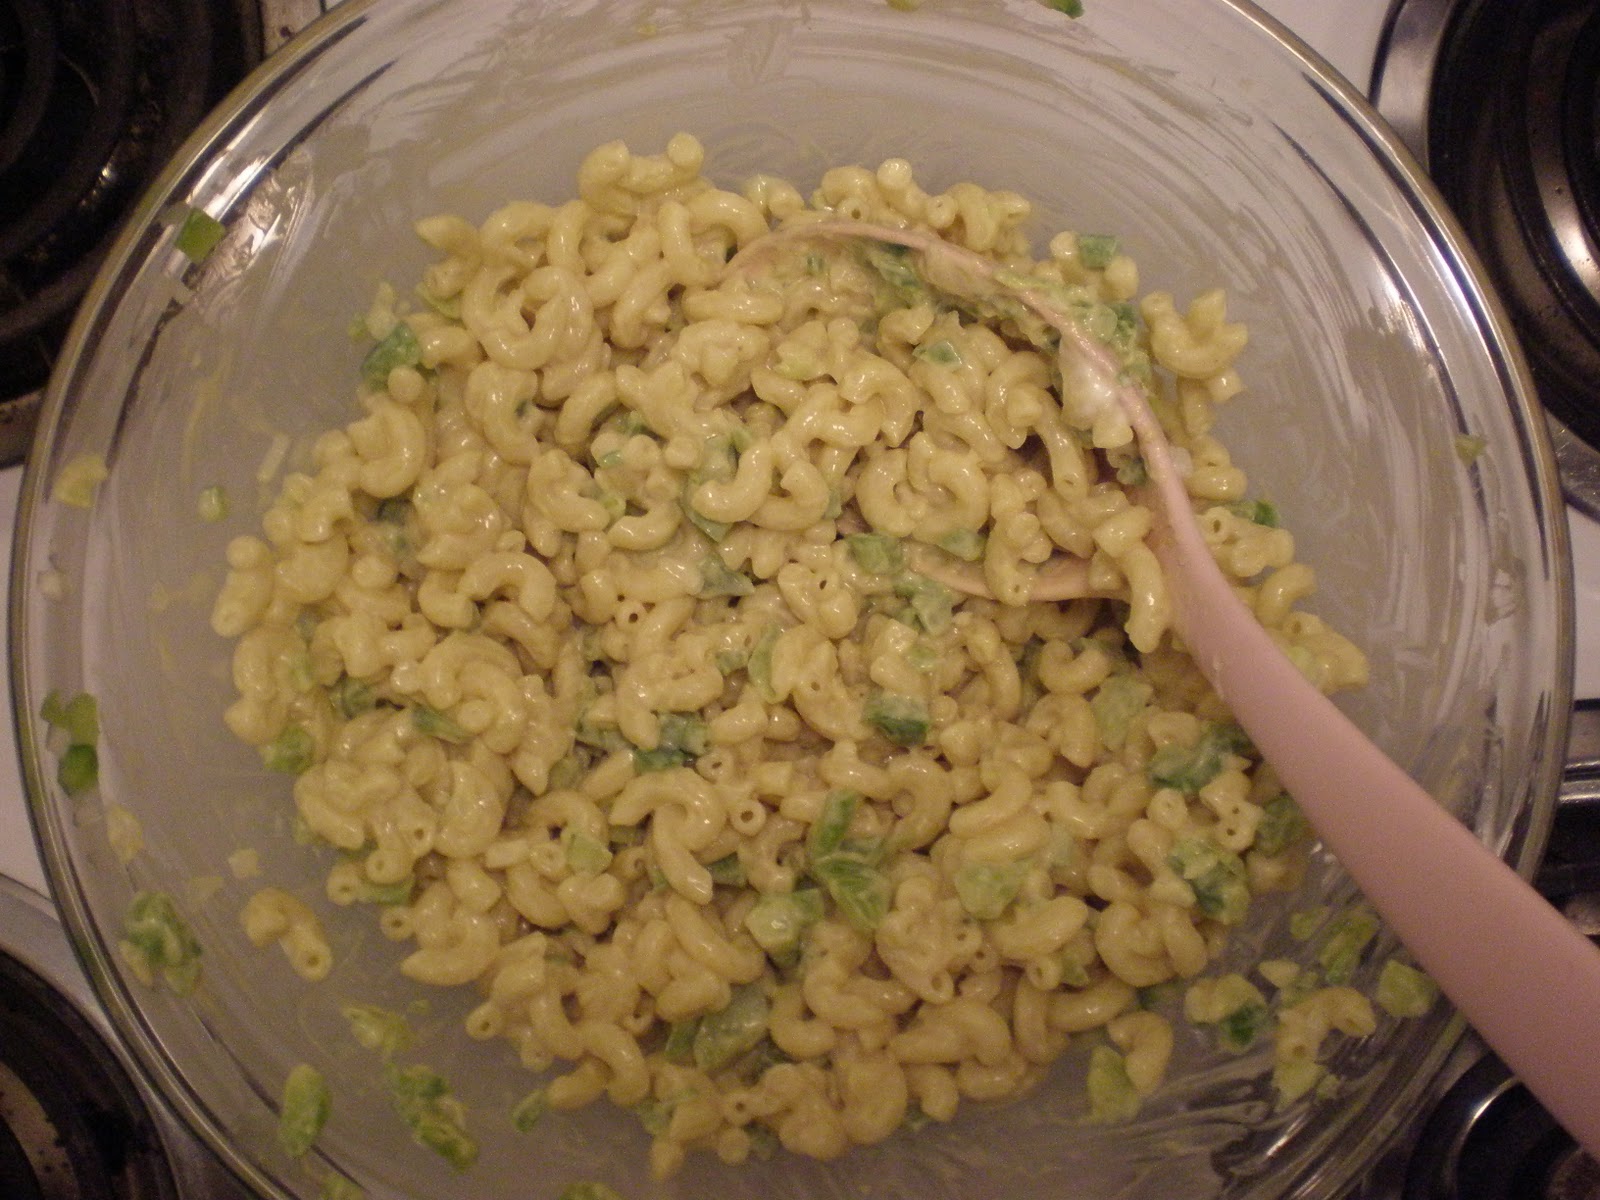


6.  (Not in the Original Recipe) I added shredded carrot


7. Chill for several hours. Add cheese before serving


I hope that you all really enjoy this. I really would love to hear what you all like to add to your macaroni salad to make it your own. I would like to add all of the different variations to this post and hopefully create a long list of how everyone personalizes their own salad. I hope that you all have an excellent day.

One Love,

Virginia


Here is a link to that song I was talking about, Girl I left Behind :)


Cheesy Biscuits - 1956

Cheesy Biscuits - 1956
Easy Cheesy Biscuits
A recipe over 50 years old can't be wrong

I love cheese biscuits. I have loved cheese biscuits every since I first had them at Red Lobster a long time ago.  I would sit there and joyfully eat 3 or 4 biscuits before our meal ever came.  These biscuits have the perfect consistency on the inside- light and fluffy yet at the same time spongy.  The inside is nice and moist, and the outside of the biscuit has the perfect thickness of crust. The cheese flavor is just right so that you can clearly taste it, yet at the same time it is not overpowering.

I got this recipe out of this really cool "Betty Crocker's Bisquick Cook Book."  The date on the book is 1956.  The original recipe is actually for a Cheese Bread; however for my family I think that a biscuit will be a lot easier to eat than a piece of bread.  Also, it was hard for me to imagine eating a loaf of cheese bread. I completely envisioned it as a biscuit because of all my fond memories of the infamous Red Lobster biscuits.  I also chose to make this in a muffin pan because it was a lot easier and less prep and clean up time. (Does this count as conserving water??)  Besides that I followed this recipe exactly as stated in this booklet. 

I really hope that you enjoy this!


Cheese Bread Biscuits - 1956

1 Egg
1 1/2 Cup Milk
3 3/4 Cup Bisquick
3/4 Cup Shredded Sharp Cheddar Cheese

Prep Time: 5 minutes
Baking Time: 20 minutes
Clean Up Time: 10 minutes

Makes one dozen biscuits

Preheat oven to 350 degrees

1. Blend together: egg, milk, Bisquick, and Cheese


2.  Pour 1/4 Cup of batter into greased muffin pan. Be careful not to overfill each slot,
as the biscuit will be twice the size of the batter. 


3.  Bake at 350 degrees for 20 minutes until tops of the biscuit are golden brown.
Sprinkle the top with Cheddar Cheese.


There you have it! The cheese bread biscuit! If you would like to make the loaf bread style instead of a muffin/biscuit form, it is really easy.  Instead of the  muffin pan, use a 9 x 5 x 2 1/2" loaf pan. Bake one hour at the same temperature.  The recipe says that if you are serving it cold to cut each slice thinly, but if you are serving it warm, to slice it 1/2" thick. The recipe also recommends to serve the bread warm. 

This biscuit taste great the way it is.  If I were to be adventurous with it, I would add maybe a 1/4 Cup of grated Parmesan cheese. I can also imagine using buttermilk, or a little bit of buttermilk instead of just regular milk.  I think that with the parmesan cheese and a little buttermilk that it might taste pretty dead on with the Red Lobster biscuits.  Also, by an awesome suggest from Debbie, most definately they have a little bit of garlic in them :).

I hope that you all enjoy this recipe. 

One Love,

Virginia

The Best Home Made Macaroni and Cheese

Thursday, November 4, 2010

The Best Home Made Macaroni and Cheese
Don't believe it? I think you should try it!

I went into this recipe feeling really nervous about whether or not it would turn out. I have tried on numerous occasions to make a good mac and cheese with horrible results. Either the cheese would be really bland or the it would be too crispy or crunchy or runny or overdone- but this came out perfect. I am really impressed how amazing this recipe came out. This is honestly the best home made macaroni and cheese that I have ever tasted. 

But honestly, the cheese completely coats the thickened macaroni noodles in it's bed of delicious creamy cheesy flavorful sauce.  The consistency of the cheese sauce was perfect. The topping was baked to perfection and provided a wonderfully tasty yet slightly crunchy topping. I really could have sat there and ate the whole dish of macaroni and cheese, but I stopped myself. My mom actually gave me the warning today to try to stay away from all of the sweets that I post on here.  LOL. I am glad that she is looking out for me. 

My original recipe for tonight was going to be a vegetarian macaroni chili with fire roasted tomatoes and red beans.  However, I sent my husband a text about dinner and he said that he had some Wendy's Chili for lunch today. Man, I don't understand. There is this 'strange' occurrence that happens every time I make chili that Rob already has had chili for lunch. He swears that he isn't ducking out on eating chili, but this is really a strange pattern. :)

Here is the recipe that I used for this Macaroni and Cheese


The Best Home Made Macaroni and Cheese

2 Tbsp Butter
2 Tbsp Flour
1 Tsp Salt
1 Tsp Dry mustard
2 1/2 Cups Milk
2 1/2 Cups of shredded Velveeta style cheese
8 Oz Macaroni (2 Cups)
1/4 Cup bread crumbs ( I used garlic seasoned bread crumbs)

Prep Time: 20 minutes
Cooking Time: 20 minutes
Clean Up Time: 10 minutes
Preheat oven to 375 degrees

1. In a sauce pan, melt butter


2.  Once butter is melted, remove from heat. Blend in flour, salt, and mustard.


3. Add milk, constantly stir on medium heat until sauce thickens and is smooth


4. Add two cups of shredded cheese; heat until melted. Stir occasionally


5. Meanwhile cook macaroni as directed; drain.


6. Combine macaroni in cheese sauce mixture in a 2 Qt casserole. I combined it in the oven safe pan that I made the cheese sauce in.  I try to be a one pan cook whenever possible. :)


7.  Top with remaining 1/2 Cup of shredded cheese, bread crumbs, and paprika.


8. Bake at 375 degrees for 20- 25 minutes or until brown and bubbly.
Make 4- 6 servings


..And there you have it!  Your very own home made macaroni and cheese.  I made corn muffins and broccoli as sides. I think the comments on my hot dog post got me thinking about eating corn dogs. 


I called my mom and told her all about my lovely blog readers and she mentioned that she had my grandmother's old Hungarian cook book. I'm very excited about this.  I told her that I wanted it right away. That and I wanted that and a bunt pan.  There is this really cool 'hidden sloppy joe' recipe that I want to make, but don't want to buy a bunt pan and just have it sit there forever and never get used. 

I hope that you all enjoy this recipe. 

One Love,

Virginia

Light N' Fruity Pie

Tuesday, November 2, 2010

Light and Fruity Pie
Thousands of combinations designed by you!
Rootie Tootie Sweet and Fruity
Move over jello mold, your getting put in a pie.

Check below for Alex's second blog debut!

This is a great desert that is easy to personalize depending on you and your family's taste.  It very sweet and tasty and you can add any fruit you want. Well, any fruit except for pineapple. There is something in the pineapple that makes the jello not congeal.  For this pie I chose cherry jello and mandarin oranges, our two favorite flavors. :)  The graham cracker crust offsets the sweet filling perfectly to give you this nice and light balanced pie.

This is another recipe that you can substitute healthier options. You can use sugar free jello, low calorie or ''free" cool whip, and a reduced fat graham cracker crust. I used regular ingredients (except for a reduced fat crust) for this pie instead of the lower calorie options. By adding it up just the standard way, I would predict that each slice of pie is going to be around 175- 200 calories.

Light and Fruit Pie

1 Pkg of Jello, small
2/3 Cup Boiling water
2 Cups Ice
1 Tub Cool Whip
1 Prepared Graham cracker crust
1 8 oz can of fruit your choice, no pineapple please!


1. Dissolve Jello into 2/3 Cup of Boiling water


2. Add Ice to gelatin until it is thickened


Remove any remaining ice if there is any left after it has thickened


3. Using wire whisk, blend in cool whip.


Blend until smooth.


4.  Fold in fruit. Chill in the refrigerator for 15 minutes.  Chilling it will allow the filling to mound and fill into the pie better.


5.  Pour into prepared Graham cracker crust. Keep refrigerated until ready to eat. Yum!


That's all there is to it. You have your very own personalized pie! Try different combinations of fruit and jello until you get exactly what you want.  If you prefer to use fresh fruit instead, you can substitute 1 cup of fresh fruit, or 1 cup of frozen fruit.  You can also mix and match fruits. The possibilities are virtually limitless. I think next time I might try some type of strawberry banana. 


The whole process of making this pie was like a big cool science experiment, from the gelatin congealing, to adding cool whip, to it thickening in the refrigerator. My little helper had a lot of hands in making this one. 

He even insisted in cleaning up afterwards.  But, honestly, he loves playing in water. He wanted to help Mama 'wash the dishes' so I cleaned up all of the knifes and scissors and all the sharp things that he could get into, and let him play in the water. I took a little video of him washing the dishes below.  He is such a little sweetheart.


I hope that you all have a blessed Wednesday, and a great end of the week.

One Love,

Virginia

Hot Dogs in a Blanket

Hot Dogs in a Blanket
No hot dog buns- You're in luck!
Fun to make for your little helpers

This recipe really looked like too much fun to pass up. You can't really go wrong with little kids and hot dogs. This was a lot of fun to cook as well as to watch cooking. The dough raises up around the hot dogs and makes individual buns as it cooks- so much fun!

The bread is really good and sweet.  It has a sweet taste similar to corn bread. The baked cheese in the hot dogs makes it taste like a cheesy corn dog. Yum!

I really hope that you enjoy this recipe. 

Hot Dogs in a Blanket

6 Hot dogs
6 Strips of Cheddar cheese/ 1 Cup of Shredded cheddar
1 Cup Bisquick
1/4 Cup Milk
1 Tsp. Parsley
1 Egg

Prep Time: 10 Minutes
Cook Time: 20 Minutes
Clean Up Time: 5 Minutes

Preheat oven to 400 degrees

1.  Mix bisquick, milk, parsley, and one egg together


2. Spread batter in the bottom of a baking dish


3. Cut Hot dogs in half, but not all the way through.  Put cheese slices in hot dogs.


4. Press hot dogs in the batter in the pan.


5. Bake 20 minutes or until bread is lightly brown. Dough will raise around hot dogs while it cooks.


6. Slice Hot dogs apart and enjoy!


It was really fun to create this easy cheesy meal.  It was enjoyed by everyone.

One Love,

Virginia