Quick Cornish Pasty - Two Year Old Approved

Friday, October 22, 2010

Quick Cornish Pasties
Two Year Old Approved

I remember when I was a child riding up north and getting pasties.  Pasties are such a great Northern Michigan tradition.  I also remember asking my  mom when we are going to get Paste-tees.  If you know my mom, you know that she is a quiet Christian woman. She would just shake her head and get all upset and tell me, "No, Virginia, past-eees not paste-teees." My poor mother. I guess she should have known back then. Lol. 

I'm starting to see a real pattern in my grandmother's recipes. They seem to be recipes that are short cuts of long recipes. For example this one uses croissant in a tube instead of making the crust yourself. The pumpkin pie was a pumpkin pudding pie with a pre-made crust. I really like this. I do enjoy cooking, but I also don't enjoy cooking anything that will take over 30 minutes of prep time.  I think when I get down to it, more prep time= more clean up time.  And in the spirit of Halloween, boo on clean up time.

This is a really easy version of a pasty recipe. It is simple and VERY delicious. I gave my 2 year old taste- tester half of one for dinner last night, and he ended up wanting seconds. Then he wanted to get into the pasties that I left over for my husband, Rob. If you have young kids, I really do encourage everyone to try this recipe.  The end result is beautiful!  I was really impressed with how beautiful it looked coming out of the oven.

Enjoy!

Quick Cornish Pasties

1/4 Lb ground beef
1/2 Cup diced potato (1 small potato)
1/4 Cup finely diced onion ( half of a very small onion)
1/4 Cup of carrots or half of a small can of carrots
1 Can of Croissants rolls
1 Egg
1 Tbsp of water

Prep Time: 20 Minutes
Cook Time: 15- 20 minutes (mine took 15 minutes)
Clean Up Time: 5 minutes
Oven Temperature 350 degrees

1. Preheat oven to 350 degrees. In a skillet on med- high cook beef, diced potato, and finely diced onion.


2. When beef is browned and onions are slightly caramelized,  add carrots. I used canned carrots. I really like using canned carrots because they were easy to chop in the pan with my spatula. They were also very easy to break down into bite size pieces.


3. Add salt and pepper to taste. Adding salt and pepper after the food is done cooking will help lock in the flavor more than if it is used while it is cooking.

4. Open can of croissants. Separate into 4 rectangles. Firmly press perforations to seal.  Flatten slightly on cookie sheet.


5.  Spoon 1/3 of cup of meat on each rectangle to about 1/2 of an inch to one of the edges.
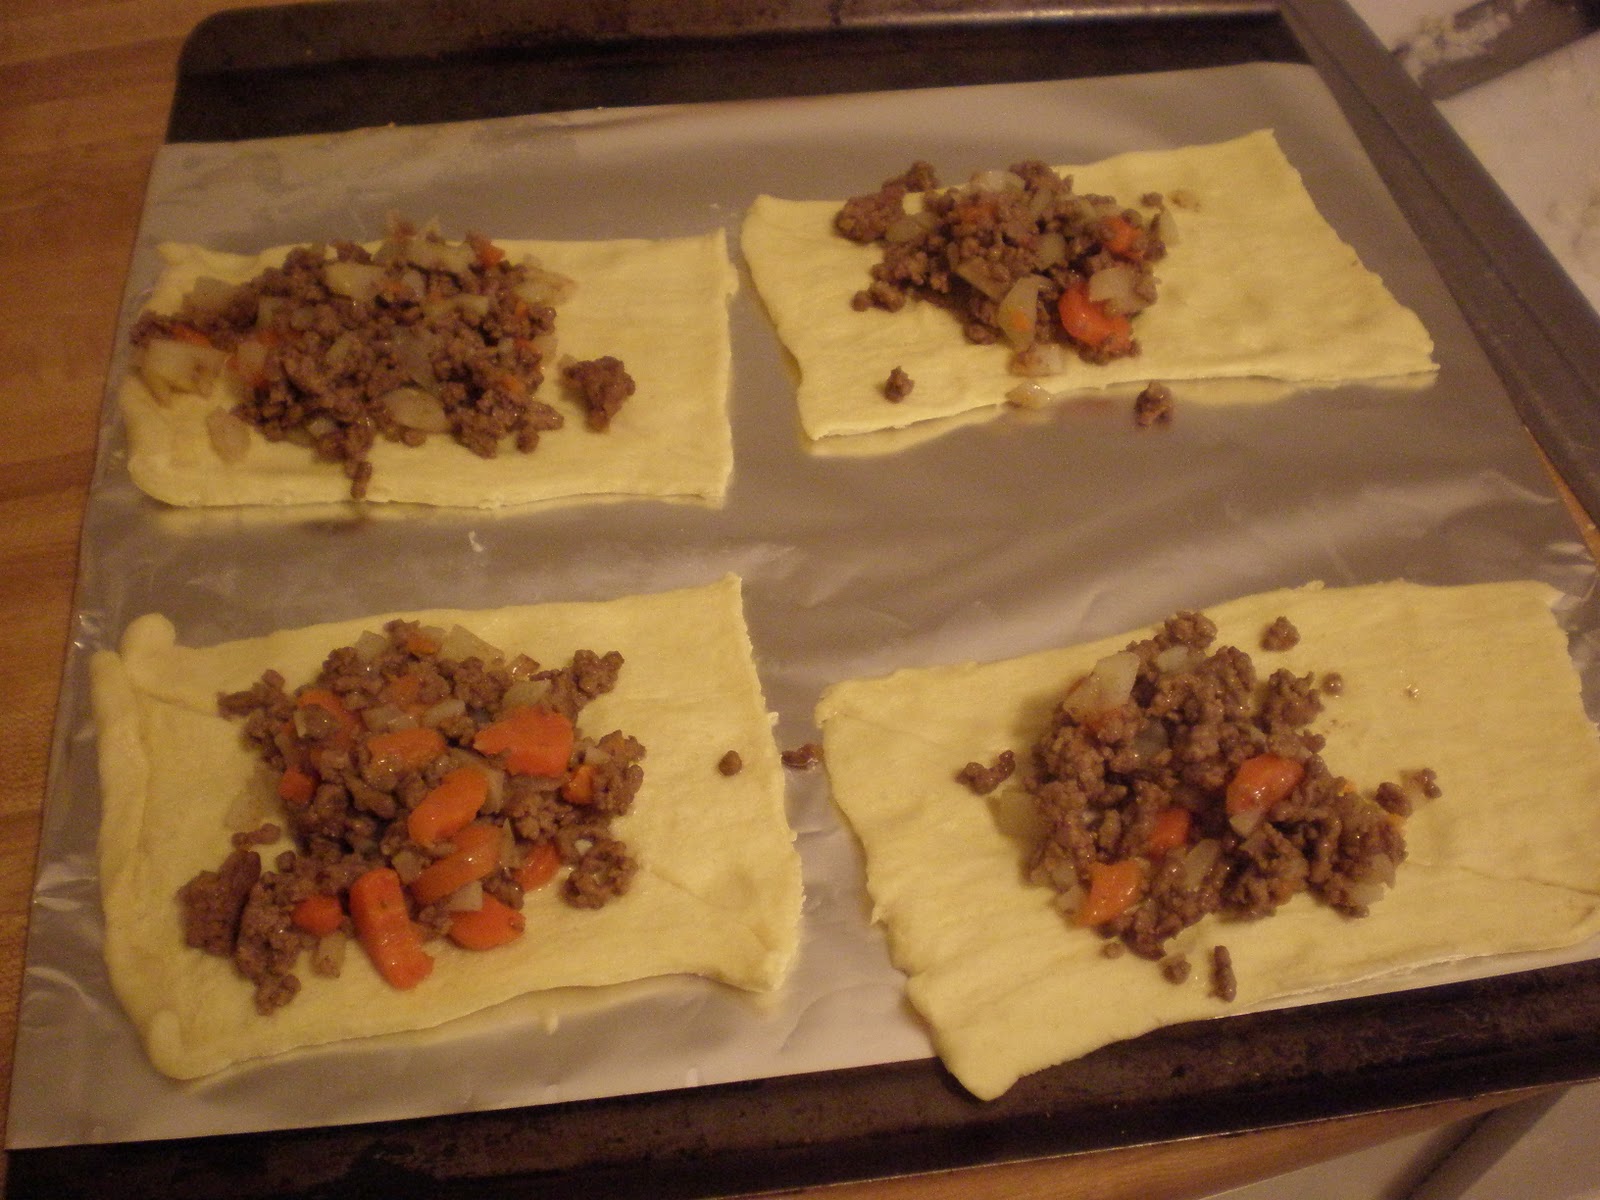


6. In bowl, beat eggs and water together. Brush on the edges of the dough.  Fold dough in half and brush with egg. Fold completely shut.


7. Cut 3 or 4 slits in the top of each pasty. Cook for 15- 20 minutes until golden brown.


If you chose to make a sauce to pour over the top of each pasty; mix together sour cream and horseradish to taste.

I decided not to make a sauce because it really didn't need it. Also, the extra calories in the sour cream don't really sound too appealing to me.

Alex really loved his. He ate it like a sandwich. Kind of like the miners did up north in the 1800's.   I will most definitely add this kid friendly recipe to my normal meal rotations. 

I asked Rob last night what he thinks about coming home and not knowing what he's going to have for dinner next. He said that he doesn't mind it at all (hopefully he's telling the truth.) I have been really into cooking with pesto lately. I can't believe that I lived so long without cooking with it. It is so tasty and full flavored. I also love cooking with fresh garlic cloves.  I love the smell of the minced garlic cooking in the pan. It's so buttery and comforting.  I've been experimenting with a lot with different sauces too. I made this really great Polynesian sauce and cooked it over homemade meatballs.  It was delicious.  Hmm. Hmmm. Hmm.

I hope you all enjoy my food from the heart for today.

One Love,

Virginia


5 Minute Pumpkin Pie

Thursday, October 21, 2010

5 Minute Pumpkin Pie
Now that's a pie I can make!

When I sat down to make this recipe I was ready to get down and make some pie! Then I read the instructions... Mix ingredients in sauce pan. Cool.  Pour in crust..... What?!? I'm loving this!

The best part of the recipe is that the ingredients aren't bad for you! It's a healthy pie! There really isn't anything in this that has a high caloric content (it's still good though don't worry).  Also, you can make one substitution and make this the perfect diabetic very low in sugar pie!

On a side note, my little helper Alex has really gotten into this blog thing too. We were making Playdough food today and he actually said, "take picture for blog". No Joke. I was so swelling with pride that I had to take these pictures just for him. So, in honor of my best helper, I have the two year old Playdough sandwich recipe ( it's really funny and cute, I promise.) Be sure to check out the video below of his Playdough taste test. It will make smile for sure!

Here are the directions to this 5 minute pumpkin pie.

Easy 5 minute Pumpkin Cream Pie

Prep Time: 2 minutes
Cook Time: 5- 10 minutes
Clean up Time: 2 minutes
Cool time: 4 hours


1 Package of vanilla pudding (substitute sugar free for the perfect diabetic pie!! )
3 Tbsp of sugar
1 Tsp pumpkin pie spice
1 Can evaporated milk 12oz
1 Egg slightly beaten
1 Can pumpkin 15 oz
1 Baked frozen pre-made 9-inch pie crust

1. Put pie crust in the oven to cook. Cooking time may vary. My pie crust said 10 minutes.


2.  Combine pie filling mix, sugar, spice, milk, egg, and pumpkin in a pan. Stir over medium heat until it comes to a full boil. Make sure not to have the burner on high or it will scald the milk.


3.  Let mixture cool for 5 minutes.


4.Pour into baked pie crust.  Be sure to stir pie filling before pouring into crust. Let pie cool in refrigerator for 4 hours.  Since this is technically a pudding pie and not a standard pumpkin pie, when it cools it will not have the same thick consistency.  Despite the consistency difference it still is a delicious pumpkin pie!

Enjoy the pie that you put all the 'hard work' into. I really am reminded of a commercial about ten years back, I can't remember what it was for. It had the lady who simply put something in the oven and sprinkled flour all over her face to make it look like she was slaving in the kitchen.  Lol. I have had hamburger helper that I have slaved over more than this. Little Alex took longer making his Playdough sandwich (see below.)

So- that's all there is to it. I'm going to seriously pat myself on the baking for this master piece too. I am also really excited that I have made a desert that I can enjoy without having to worry about how many sugar or calories are in it.  Unlike the Chocolate and Oatmeal bars that were prob. somewhere close to 450 calories per serving, I bet this whole pie has close to 600 calories. So lets see a serving and a half of Chocolate Oatmeal Bars or a whole pie! I'll go with the pie on this one. Also, I'm not too sure how the weight watcher system would work on this one, but I think that you can count it as a vegetable too.


For Alex's second birthday  he got this giant tube of Playdough. I don't know exactly who it was from, but I'm thinking it might be from grandma. It has everything in it! It's got 45 cut out and squeezer machine pieces, all kinds of colors of playdough. It is really a ton of fun to play with- for all ages!! Below I have listed the 'recipe' for 'making' the playdough food.

Playdough food!!

One large can of Playdough stuff from Target

1. Dump the whole freakin' bucket on the floor. The more floor you can cover the better.


2. Cut out your little Playdough pieces!!


3. Put them together for you fun sandwich! Hey, Alex....But don't eat the Playdough pieces. Did you hear me, Alex?? Mama is only going to ask you one more time before I have to put it up!!! Ok, thank you sweetie, you're a good boy.

No, Alex was such a good boy! He really didn't try to eat the playdough food. We had the discussion at the library though with the play food that they have in one of their educational boxes. 

This maybe slightly self indulgent, but I really think this video is cute. I almost considered the thought that it would go viral. Then my common senses came back down, and I realized that it probably wouldn't.  I think this is the cutest video in the whole entire world. When Lil Al watched it he LOVED it! He kept on giggling and laughing. 

I hope you all have an excellent day! And enjoy cooking


If for some reason the video isn't working please click on this link  Playdough Food. Nom. Nom. Nom


One Love,

Virginia

Chocolate Chip and Oatmeal Cookie Bars

Monday, October 18, 2010

Chocolate Chip and Oatmeal Cookie Bar

AKA: Chocolate Chip Granola Bar's fat cousin before  The Biggest Loser.
If drinking a Guiness is equal to drinking you dinner, this is equal to eating your dinner.
Warning: Must eat with milk


Move over Triple Whopper with cheese, there is something more dangerous in town. It's the Chocolate Chip and Oatmeal Cookie Bars. It's ohhh soo sweet, oohhh soo chewy, AND ohhh so bad for you.  It contains a whole can of condensed milk.  If you're not familiar with condensed milk, it is the same thing that they use in fudge. I have to admit that I usually look at the nutrition facts on every label. You can all imagine how far my eyes rolled back in my head when I saw this label. Holy smokes - 1300 calories in this can alone. Once you add the almost 2 cups of brown sugar, half a bag of chocolate chips, not to mention butter - you get one "Big Mac" chocolate chip cookie bar. 

If you need to knock out of the deadly sins for the day, making this cookie bar will most definately get you one step closer.  It's so delicious.  After eating just one little square of this delicious treat my body was on an all over sugar buzz. 

There is a conception that when you make a 'bar' instead of a 'cookie' that typically the 'bar' comes out really dry.  This recipe is most definately not the recipe to make an oatmeal chocolate chip cookie. It really has been modified, and perfected to give you this freaking AWESOME treat.

Enjoy this everyone! Also, please be sure to go for a nice long walk/bike ride after you eat this. 

Chocolate 'N' Oat Bar

1 Cup flour
1 Cup quick- cooking oats
3/4 Cup firmly packed light brown sugar
1/2 Cup butter, softened
1 Can sweetened condensed milk
1 Cup chopped nuts
1 6 oz package semi- sweet chocolate morsels (half of a bag)

Preparation Time: 10 Minutes
Cooking Time: 40 Minutes
Clean Up Time: 10 Minutes
Time on the Tredmill: 1 hour

Preheat oven to 350 degrees

1. Combine flour, oats, brown sugar and butter. Mix well.

2. Reserving 1 cup of oat mixture, press the oatmeal mixture in the bottom of you baking dish.


3. Bake for 10 minutes at 350 degrees

4. Pour one 14 oz can of sweetened condensed milk over baked crust.

5. Sprinkle with nuts and chocolate chips


6. Top with remaining oat mix.  Press down. Make sure to cover the edges and corners with the oat mixture.  This will ensure that the condensed milk does not boil over the edges during baking.


7. Bake 25 to 30 minutes until lightly browned.  Cool.


I hope you all enjoy.  Also, it helps out if you can get a little helper to do the dishes ;)


One Love,

Virginia

Ham and Cheese Casserole

Sunday, October 17, 2010

Ham and Cheese Casserole
Great for dinner. Even better in an omlet. Yum!

I decided to make one of my grandma's recipes for Sunday night dinner. Well, I guess it wasn't much of a Sunday night dinner because my handsome husband was sick. I also had to run and turn in the Red Box movies because my schedule for the day was running a little behind. 

We have been saving a ton of money by eating at home. Thank God for the Meijer sales too! This week they had the 10 for $10 sales, and last week they had the Meijer brand products on sale. Needless to say, I stocked up my cabinets.  I think that with all of the groceries that are in my kitchen right now that I have enough for the next two weeks, lol. 

Recently, I have been doing this great 1 bag 5 dinner program on the Kraft website. It's a great free website that has recipes for 5 days and a list of groceries that you need to buy for the week.  It usually costs about $50- 60 for the 5 days worth of groceries.  This also includes staples like: snacks, milk, egg, and chocolate. 1 bag 5 dinner link

This recipe was really good. Of course, I love to eat so I may be a little biased. I hope you enjoy!

Ham and Cheese Casserole

1 lb of ham, chopped
4 medium pototoes, chopped
1 onion, cut finely
1 tsp of parsley
Salt and pepper to taste
White Sauce (recipe below)
2 Cups of shredded cheddar cheese

Preperation time: 15 minutes
Cook Time: 1hr
Cool Down Time: 20 minutes
Clean up time: 10 minutes

1. Preheat over to 350 degrees

2. Line bottom of casserole dish with chopped potatoes, next add a layer of onion

3. Add a layer of ham, Repeat layers

4. Top casserole with white sauce (recipe below) and shredded cheddar cheese. I used a cheese sauce that I had made ahead of time, and put in the freezer. My special "eat your veggies" cheese sauce. :)  My little boy helped me out with this step. He also eat some of the shredded cheese off of the top. lol. :p


5. Bake covered for 30 minutes, remove cover and bake an additional 30 minutes

  
6. Allow casserole to stand for 20 minutes so that the sauce thicken. I was kind of disheartened when I took this out of the oven and stuck my spoon in it and everything was runny.  I actually decided to give up on the entire thing and make something else because it was too late already. But after about 20  minutes when the casserole began to cool, the casserole began to get thicker. The cheese on my casserole got a little dark, but it didn't burn. I promise!


White Sauce

3 Tbsp butter
3 Tbsp flour
1 1/2 Cup milk
Salt and pepper to taste

Melt butter in sauce pan; blend in flour.  Stir continuously  as you pour in milk mixture.  Cook until thicken. Add salt and pepper to taste. A lot of the pasta sauce companies also have cheese sauce in a jar. I think that this will work out perfectly. I used my own home made cheese sauce that I made in a vat and froze. 

This one is most definately toddler approved. This was the first thing that he ate on his plate. I really like this alot. I think that I am going to save this and add it to my eggs tomorrow morning. It would also taste good fried a little bit in the pan. Yum ! Yum! 


I have some great desert recipes prepared for this coming week.  You are in for some great sweets! Including pumpkin pie. 


One Love.

- Virginia

Peanut Butter and Jelly French Toast

Saturday, October 16, 2010

Peanut Butter and Jelly French Toast
Two year old tested. Mother approved.

This recipe was so easy and delicious. I will most definitely add this in my rotation of meals.  I have always liked stuffed french toast, but all of the stuffed french toast recipes that I know take a lot of time and effort. This one was so simple and easy, and had the basic same results.


My little 2 year old son absolutely loved this! He got really excited when he saw that I was making peanut butter and jelly sandwiches for him.  When I told him that he was going to have to wait just a little bit longer, and that Mama was making him something special, he automatically started crying.  I don't know what is more sad, the fact that my poor little baby is crying, or that I think that he is so cute crying that I have to take a picture of it. :)  Oh man, the things that we have our little ones do.  I will try not to post any pictures that are too embarrassing for him though.  At least pictures that won't be embarrassing until he's 16. 


Here is the recipe. I highly recommend that if you already don't make this at home, that you try it for you next breakfast/lunch/ brunch. It was so delicious! Grilling the peanut and jelly made the peanut butter all soft and warm. It completely changed the inside texture into something a little bit more appealing than standard peanut butter.  I hope you all enjoy!


Peanut Butter and Jelly French Toast - 1960's

 Prep Time: 5 minutes
Cooking Time: 5 minutes
Clean Up Time: 5 minutes

3/4 Cup Peanut Butter, Creamy
6 Tablespoons of your favorite Jelly ( I used strawberry)
12 slices of bread
3/4 Cup of Milk
3 Eggs
Dash of Cinnamon
Non stick cooking spray
1. Make your peanut and jelly sandwiches as usually. I used creamy peanut butter and strawberry jelly. 


2.  Mix together eggs and milk for french toast solution. I always add just a little dash of cinnamon to my french toast.  This was especially good here because it brought out more of the peanut butter and jelly flavor.


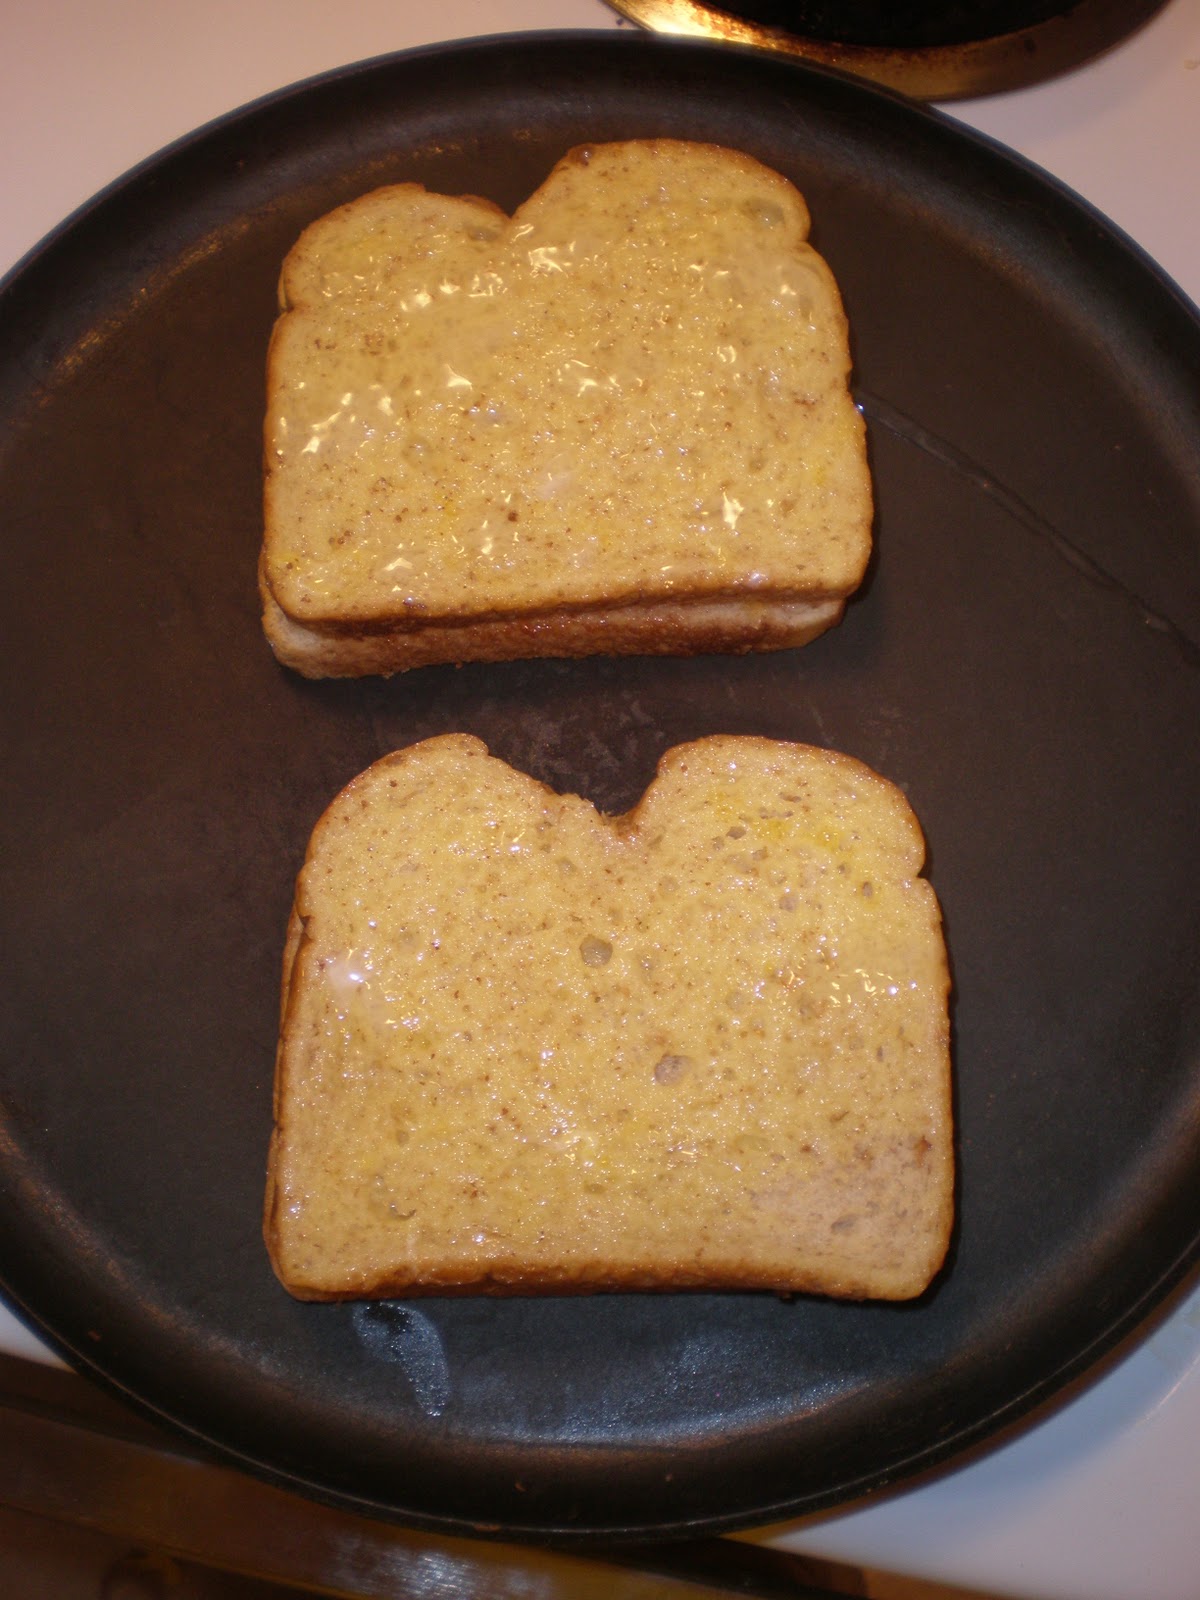
3.  Dip sandwich tops in egg mixture.  Flip around and dip sandwich bottom in egg mixture.


4.  Apply non stick cooking spray or butter to pan that you are using. Turn on stove to medium heat. ( The sandwiches are a little heavier than your usual french toast. It may cause your sandwich to stick to the pan.  I have really nice non stick pan and it still got stuck a little bit.)


5. Cook each side of the sandwich evenly. This will take about 3 minutes on either side. Each side will be done when it appears slightly brown. - Not black, black means burnt.  JK.

6.  Enjoy! The peanut butter and jelly inside the sandwich will be HOT. STEAMING HOT !So be careful before giving it to any small children.


My son really loved this sandwich. It really combined two of his favorite meals into one : PB & J and french toast. 


I hope you all enjoy this recipe.  Also, if anyone has a good recipe for stuffed french toast with cream cheese, I would love to have it. 


- Virginia

Apple Dilly Cake - It's a dilly of a cake!

Friday, October 15, 2010

Apple Dilly Cake-
Very similar to Carrot Cake in texture and sweetness.  Extremely aromatic.

I have been really excited to get started on my blog project. Fortunately, my parents stopped by and gave me one last ingredient to make this delicious cake - apples!  I also learned that most of this collection of recipes came from my grandma's bridge club.  All the ladies would get together and cut out and share their recipes with each other.  I think this is very nice. My grandma was a very pretty popular party lady back in the day.  She was also a strong Hungarian woman with a wild streak a mile wild and a talent for cooking.  lol.  Knowing this about her, I can completely see her with her lady friends smoking a cigarette and drinking a scotch. 

This recipe came from 1963, and I had some questions about what could be different in the past 45 years.  First of all the recipe calls for flour.  Is my all purpose flour the same as the flour on the recipe card?  That sent me googling - for the first time.  I couldn't exactly find when all purpose flour began being sold. Maybe I was just over reacting and all purpose flour is as old as time.  Maybe the cave men used all purpose flour.  The only thing that I found on google was that there are two types of flour 'bread flour' and 'all purpose flour'. Bread flour is for, as the name suggests, for making breads. It contains a lot of glutten that will make the dough more chewy.  All purpose flour contains more wheat flour. The wheat flour is low in glutten. This makes the dough more light and fluffy.  Alright, good to know. So, I dumped in my 'all purpose flour'.


The second problem I came into is the ingredients for the frosting. It says to make a boiled frosting with egg and apples.  What? Where's the boiling? How the heck do I cook this? What does it mean boiled frosting with egg and apple? I googled- for the second time.  I had no idea how to make real frosting besides cream cheese frosting.  I couldn't find a good boiled frosting recipe that where I had all of the ingredients (some required corn syrup.) I decided to just get the can of vanilla frosting from my cabinet out and add apples to it. LOL. This whole baking thing will require BABY STEPS.  

I thought about the whole frosting thing out. Is it possible that women of the 60's just baked so much that they could make a boiled frosting with just the mention of apples and eggs? Probably. I really wish that I knew how to bake like that. 

On  my last blog post, I added some pictures of the some of the funny and historical papers that I found in my grandmother's collection. I have a really great 'vintage' cigarette ad that was on the back of the recipe at the bottom of this post. If I were in the 1960's I would completely smoke a pack of day just looking at it.


Here is my first recipe! I hope you all enjoy!


Apple Dilly Cake

The cake is very light and fluffy, not to mention extremely aromatic! The recipe calls has an apple cake and a boiled frosting type of frosting. 

Prep Time: 12 minutes
Cook Time: 35 minutes
Clean Up Time: 10 minutes

1/2 Cup butter or margerine
1    Cup Sugar
1    Egg, well beaten
1 1/2 Cup sifted flour
1 Tsp. Baking Soda
1/4 Tsp. Nutmeg
1/4 Tsp. Salt
1 Tsp. Cinnamon
1/2 Tsp. Cloves
1/4 Tsp. Nutmeg
1/2 Cup coffee
1 Cup chopped apples
1/2 Cup chopped walnuts
1 Cup chopped raisins


1.  Cream together butter and sugar


2.  Add beaten eggs and blend well
3. Sift together dry ingredients and add to the mixture

4. Add coffee to ingredients

5. Stir in Apples, nuts, and raisins.


6.  Turn into greased and floured 11 x 7 x 1.5" pan.


7. Bake at 350 degrees for 35 minutes. Cool.

8. Frost with boiled frosting recipe mixed with 1 Cup of chopped apples that consists of eggs. (I frosted it with vanilla frosting with chopped apples mixed in.)


Since the cake was only about 1.75" tall i decided to cut it in half and frost it on top of each other. 

The vanilla frosting that I substitued was really sweet.  I think if I were to make it again, that I would learn how to make a boiled frosting recipe. The combo of the sweet baked raisins and sweet vanilla frosting was just a little bit to sweet for my tastes.

I have to say that this cake really reminds of carrot cake.  It has the same texture and consistency. It has the same amount of sweetness that carrot cake has also. 

Every one of these recipes is a little adventure. I think this cigarette ad- from 1963- is great. I really wish I was that lady.


Yummm.... the "cool air softened" taste of Salem. I think I will pick up a pack ---- JK.


Virginia