Ice Cream Candy Cones

Sunday, November 14, 2010

Ice Cream Candy Cones
Bugle Cones
Easy Novelty Candy in No Time

This is a great little sweet treat to bring to fun holiday parties.  It is a sweet candy dipped in chocolate with sprinkles set on top of a bugle to make it look like little ice cream cones! It's very cute, and also very tasty.

Ice Cream Candy Cones

2 Tbsp Butter (no subs.), softened
1 1/3 Cup Confectioners' Sugar
1/4 Tsp Salt
1/4 Tsp Vanilla Extract
2 Tbsp Sweetened Condensed Milk
1 Bag Bugles
1/2 Cup Semisweet chocolate chips, melted, optional
Assorted Sprinkles, and or nuts

1. In a small mixing bowl, cream butter and sugar


2.  Beat in salt and vanilla


3.  Add Condensed Milk.  Mixture will be stiff.


4. Roll filling in 1/2 " balls and place on top of bugle cone.


4.  Place 'ice cream cones' in refrigerator. Melt Chocolate Chips.


5.  Roll 'ice cream cone top in chocolate and decorate with sprinkles or nuts.


6. Place in refrigerator to cool candies

I hope you all enjoy this fun holiday recipe!

One Love,

Virginia

Crepes

Crepes- 1950's
"Swedish Pancakes"
" ' Old country' flavor without old-time fussing!"
Pancake Donut (2 yr old talk)

This a great basic crepe recipe! I love crepes, but rarely ever eat them.  When I was reading through the recipes this was called, "Swedish Pancakes".  I never thought of a crepe as a Swedish pancake before, but maybe I need to know more about crepes.  I also love the tag-line underneath it. " ' Old country' flavor without old- time fussing." I wonder what old time fussing is. What do you think that they had to do that would have taken longer to make this? Grind the flour themselves?  I guess I will never know.

Anyways, this is a great basic crepe recipe. The crepes where sweet and thin. There are a lot of different things that you can put inside it, but I just went for some strawberry preserves. Now that I know that I can make these, I might just look up other great things that I can put in the middle. :) Enjoy!

Basic Crepes

Preparation Time: 5 Minutes
Cook Time: 2 Minutes/ Crepe
Clean Up Time: 10 Minutes
Makes 20 Crepes

1 1/4 Cup Bisquick
2 Cups Milk
3 Eggs
1/4 Cup Butter, Melted
Jelly for Center

1.  Beat together all ingredient.


2.  In 6" or 7" non stick skillet, spoon 3 Tbsp of batter.

3.  Cook until small bubbles appear on surface.  Loosen edges with spatula, turn pancake gently and finish baking other side.


4.  Spread each with sugar, jam, applesauce, or whipped cream.


5.  Roll up like Jelly Roll. Serve warm.


I hope that you all enjoy this.

One Love,

Virginia


Peach Crisp -1956

Saturday, November 13, 2010

Peach Crisp- 1956
"Give me some of that cobbler/ pie/ crispy thing"

When I came home from Pizza Hut, and Rob had taken this out of the oven, all I could smell was this sweet peach cobbler smell all over our house.  The aroma was so intense that I might even consider making this as a potpourri (not really.)

This was just the right amount of sweet for us.  I don't think that Rob or myself really like things that are overly sweet. It was a little bit of sweet topping combined with the sweet and slightly tart peach filling underneath.  The texture of the crisp was crispy on the top and a cobbler like texture underneath.  The peaches were baked just right so that they retained all of their juices, yet were soft enough that they balanced the texture of the crispy top.

For this you can use either fresh fruit or canned fruit. I have really gotten hooked on these all natural jarred peaches from Dole. They are jarred in 100 percent peach juice.  Also, the color of the peaches is correct. Sometimes when you buy canned peaches and open them up, they aren't the same color as fresh peaches. So, Dole, here is your free endorsement. :) You can send me a case of your these peaches now. Ha ha. 

For this recipe it really is your choice if you use peaches or apples.  I chose peaches because I wanted something different from all the apples that I have eaten over Michigan's apple season.

I really hope that you enjoy this recipe :)

Peach Crisp

4 Cups peeled fresh peaches or 3 small jars/cans, drained
2 Tbsp Water ( If you are using fresh fruit)
1/4 Cup Sugar
1 1/4 Cup Bisquick
1/2 Cup Sugar
1/2 Tsp Cinnamon
1 Egg, Slightly Beaten

Prep Time: 10 Minutes
Cooking Time: 20 Minutes
Clean Up Time: 10 Minutes
Servings: 6 to 8

Preheat oven to 400 degrees

1. Place fruit in the bottom of a 9 x 12 non stick or greased pan


2. Sprinkle with 1/4 Cup of Sugar.  Sprinkle first with 2 Tbsp water first if using fresh fruit.


3. Mix Bisquick, sugar, and cinnamon.


4. In separate bowl, beat one egg.


5. Slowly add dry ingredients to egg mixture. Stir constantly until crumbly.


6. Sprinkle mixture over peaches.


7. Bake at 400 degrees for 20 minutes until crust is golden brown.


I really hope you enjoy this fun little treat. I hope you all have a great day.

One Love,

Virginia

Philly Cheese Steak

Philly Cheese Steak
Steak- Yums!!!
Perfect meal when you just want to smash something!

I'm so proud of myself, I made my very own cheese steaks all by myself. Usually I go and buy the $8 box of Steak ems, but I saved a whole $3.00 making this from cube steak.  Yay! And its fresh meat instead of the overly processed (but very very delicious) alternative.  Yay!

This is a pretty good alternative to going out and buying a Philly Cheese Steak if you don't want to go out. However, there are some restaurants that make the most amazingly delicious cheese steaks that this home made version can't touch. This is really good though, and also a great recipe if you have any pent up aggression you want to take out with a mallet (see directions below.) Enjoy!

Philly Cheese Steak

2 Tbsp of Butter or Margarine
4 Medium Onions, chopped to desired size
4 Hero/Sub/Hoagie rolls (6 to 8 inches)
1 1/2 Lb Beef Cube Steaks
1/2 Tsp Salt
1/4 Tsp Pepper
1 Tbsp Oil
8 Slices of Swiss Cheese
Steak Sauce

1. In a medium skillet, melt butter and saute onions over med. heat until browned (about 10 minutes)


2.  Set Onions aside and keep warm.


3. Preheat oven to 350 degrees. Slice rolls lengthwise, wrap in foil and warm in oven.

4. Place Cube Steak between two sheet of wax paper and pound flat as possible with a rolling pin or mallet


5.  Season meat with salt and pepper.

6. Heat oil in skillet on high heat.  Saute steak until browned,  about one minute on each side


7. Place meat on warm toasted bun from oven, top with cheese and onions. Sprinkle with Pepper


8.  Top with steak sauce if desired.


 There you have it! Your very own homemade Philly Cheese Steak! I really always wondered what that strange looking cubed steak was in the meat department, now I know!  This was a lot of fun to make something from scratch with only the directions and the ingredients.  I really put a lot of blind faith into making this and it turned out just right! Hooray!

Have a great day everyone.

One Love,

Virginia

Mini Meat Loaves - 1999

Wednesday, November 10, 2010

Mini Meat Loaves - 1999
Single Serving Meatloaf

I already had it on my weekly menu to make meatloaf before I came across this recipe. I originally wanted to make a cheeseburger meatloaf that was on the kraft.com website (my favorite recipe website), but when I found this recipe, I decided to make this one instead.

When I was eating this a dinner time, my little boy said to me, "Mommy, I want meatballs." I had his mini meat loaf cut up, so he really couldn't tell if it was a meat ball or meatloaf.  It took me a second to figure it out, and then it occurred to me, this recipe for meatloaf is almost exactly the same as my meat ball recipe. It amazes me sometimes how such a little guy can have such a 'simply great' thought process that he can connect the two. Little kids really are amazing.

The barbecue sauce in this made extra tasty and tangy ( I used the Jack Daniels no. 7 BBQ Sauce.) On the downside, the meat in the meat loaf was kind of loose on the inside. While the meat loaf did not fall apart when I took it out of the pan, it was loose when we cut it on our plates. I don't know if this is because I didn't pack it down enough, or if this is how it was supposed to be. Nonetheless, I really liked this. The mini meat loaves were the perfect small serving little size. My husband and I aren't really big eaters, but we ate about a mini meat loaf and a half. 

Mini Meat Loaves

1/2 Cup Finely Chopped Onion
1/2 Cup Finely Chopped Pepper
1/2 Dry Bread Crumbs
1/4 Cup BBQ Sauce
1 Egg
1 1/2 Lb ground beef

Prep Time: 10 Minutes
Cook Time: 20 Minutes
Clean Up Time: 15 Minutes

6 Mini Meat Loaf Servings

Preheat oven to 375 degrees.

1.  In a large bowl, combine the first five ingredients.


(No, this isn't baby poo poo)


2.  Add Beef. Mix well


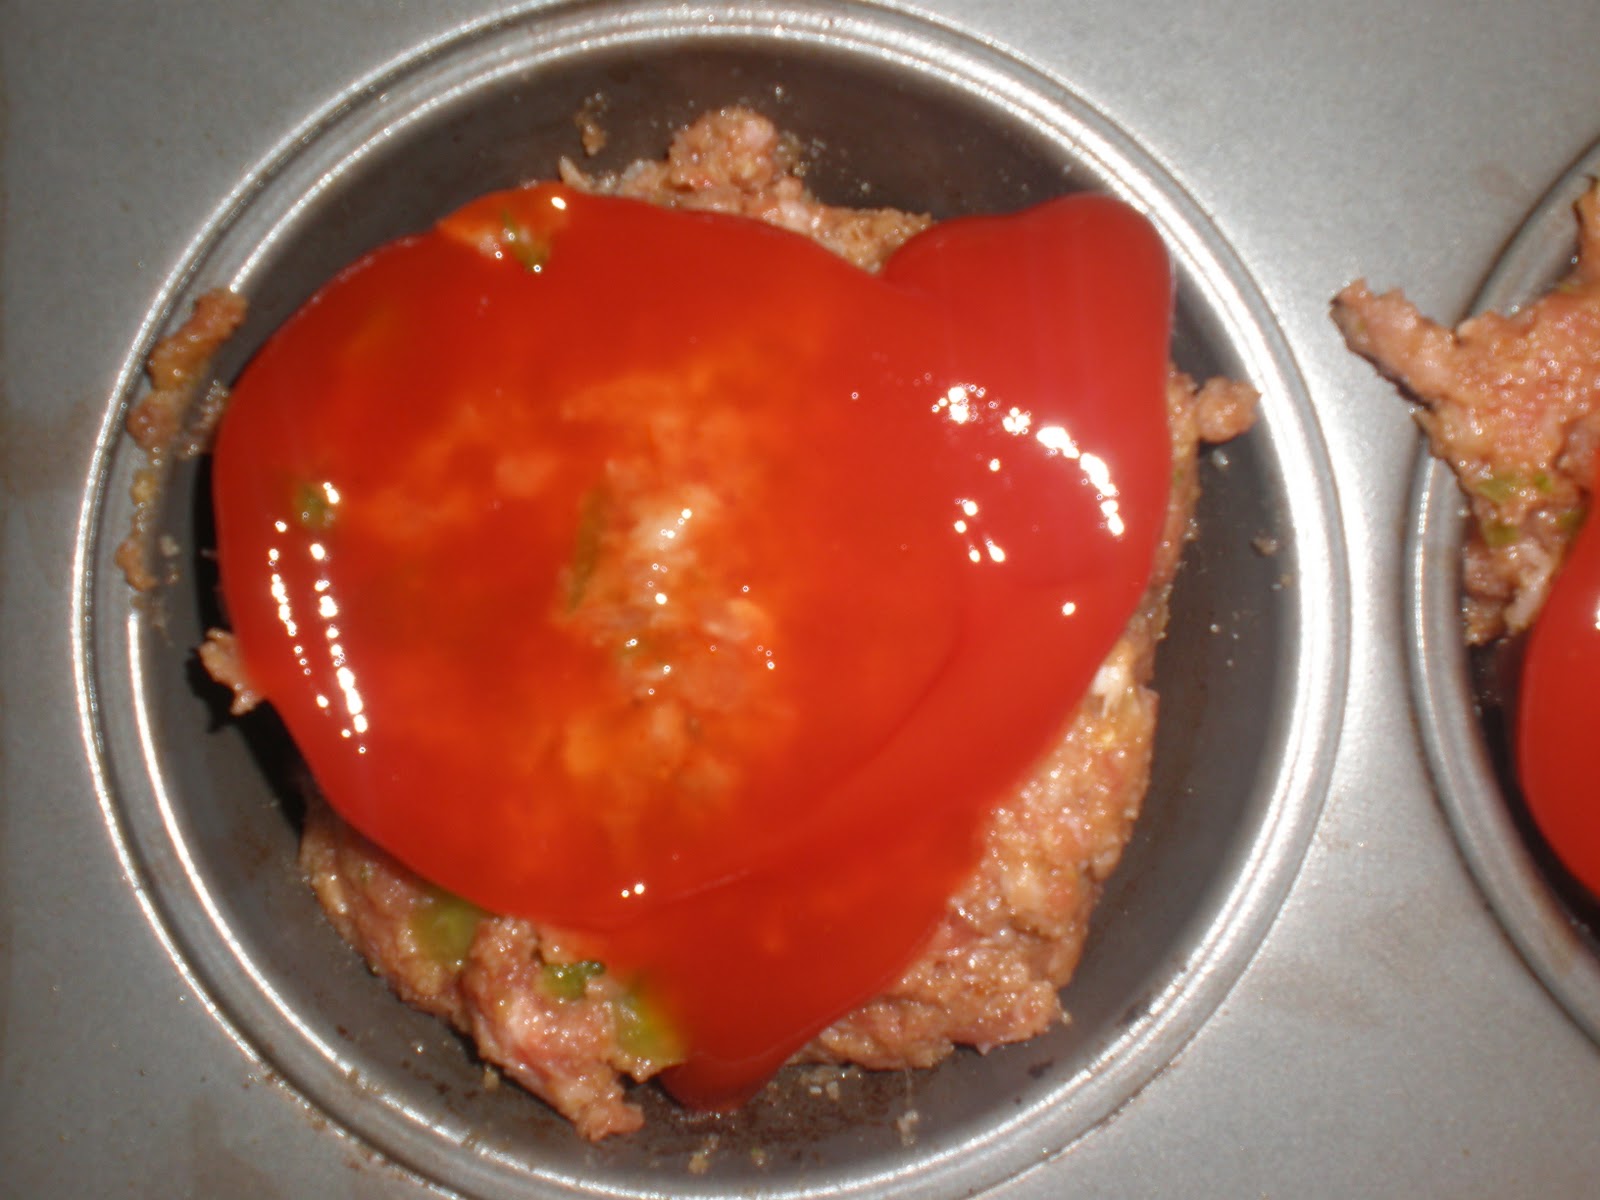
3. Press 1/3 cupfuls into six ungreased muffin cups.


4. Top with Ketchup. 


5. Bake at 375 degrees for 18- 20 minutes, or until meat is no longer pink.


I hope you all enjoy this. I apologize about the pictures on this one.  I don't know if there is anything really attractive about making meat loaf. You almost have to release your inner carnivore.  Usually, I make a meatloaf that has oatmeal in it. Maybe next time I make mini meat loaves I can use my regular recipe instead of this one.  Ah, the sky is the limit!

I hope you have a great day.

One Love,

Virginia

Macaroni Salad (Topinka's Macaroni Salad) - 1980's

Macaroni Salad "Topinka's Macaroni Salad"
Macaroni with a slight kick
Bust out your salad with an awesome solo

Everyone has their own version of macaroni salad. There are so many different variations- and if you ask me, they are all delicious!! I guess when you run into a classic recipe like this one, it is easy and enjoyable to change it up a little bit and personalize it.

 As a side note, I recently started taking my mandolin lessons from a new instructor. He wanted me to play a song I knew well, so I played a bluegrass classic, "The Girl I left Behind". I asked him if he played it different, and his response is that everyone plays it different. That when you get to such a classic song, that everyone plays it differently. And that these staple songs are where people put their own style into what they play.  Then I started thinking today, maybe this is that kind of recipes.  Most people who cook know how to make macaroni salad; and most people that make macaroni salad have their own versions. Maybe us as humans, feel a need to express our creativity in that which we find comfort.  I don't know. Maybe that goes too far for my food blog; and I need to stick to my song and recipe. lol.

This recipe is called Topinka's Macaroni Salad.  When I googled it, the powers that be Google said that it was a restaurant in Detroit. So, in honor of my late Grandmother and the late restaurant here is the recipe.

I did change this recipe a little bit. I added shredded carrots. I did this for one reason. My husband Robert's favorite macaroni salad in the entire world is his mother's macaroni salad.  He won't even taste any other macaroni salad.  I don't know if this will work yet, but the carrot might make it appear to look more like his mom's macaroni salad- so he might actually try it, right?? I guess we will have to test this theory out later. :) I also took out the pimentos.  I don't really like pimentos. I have listed them in the recipe below, but I did not use them.

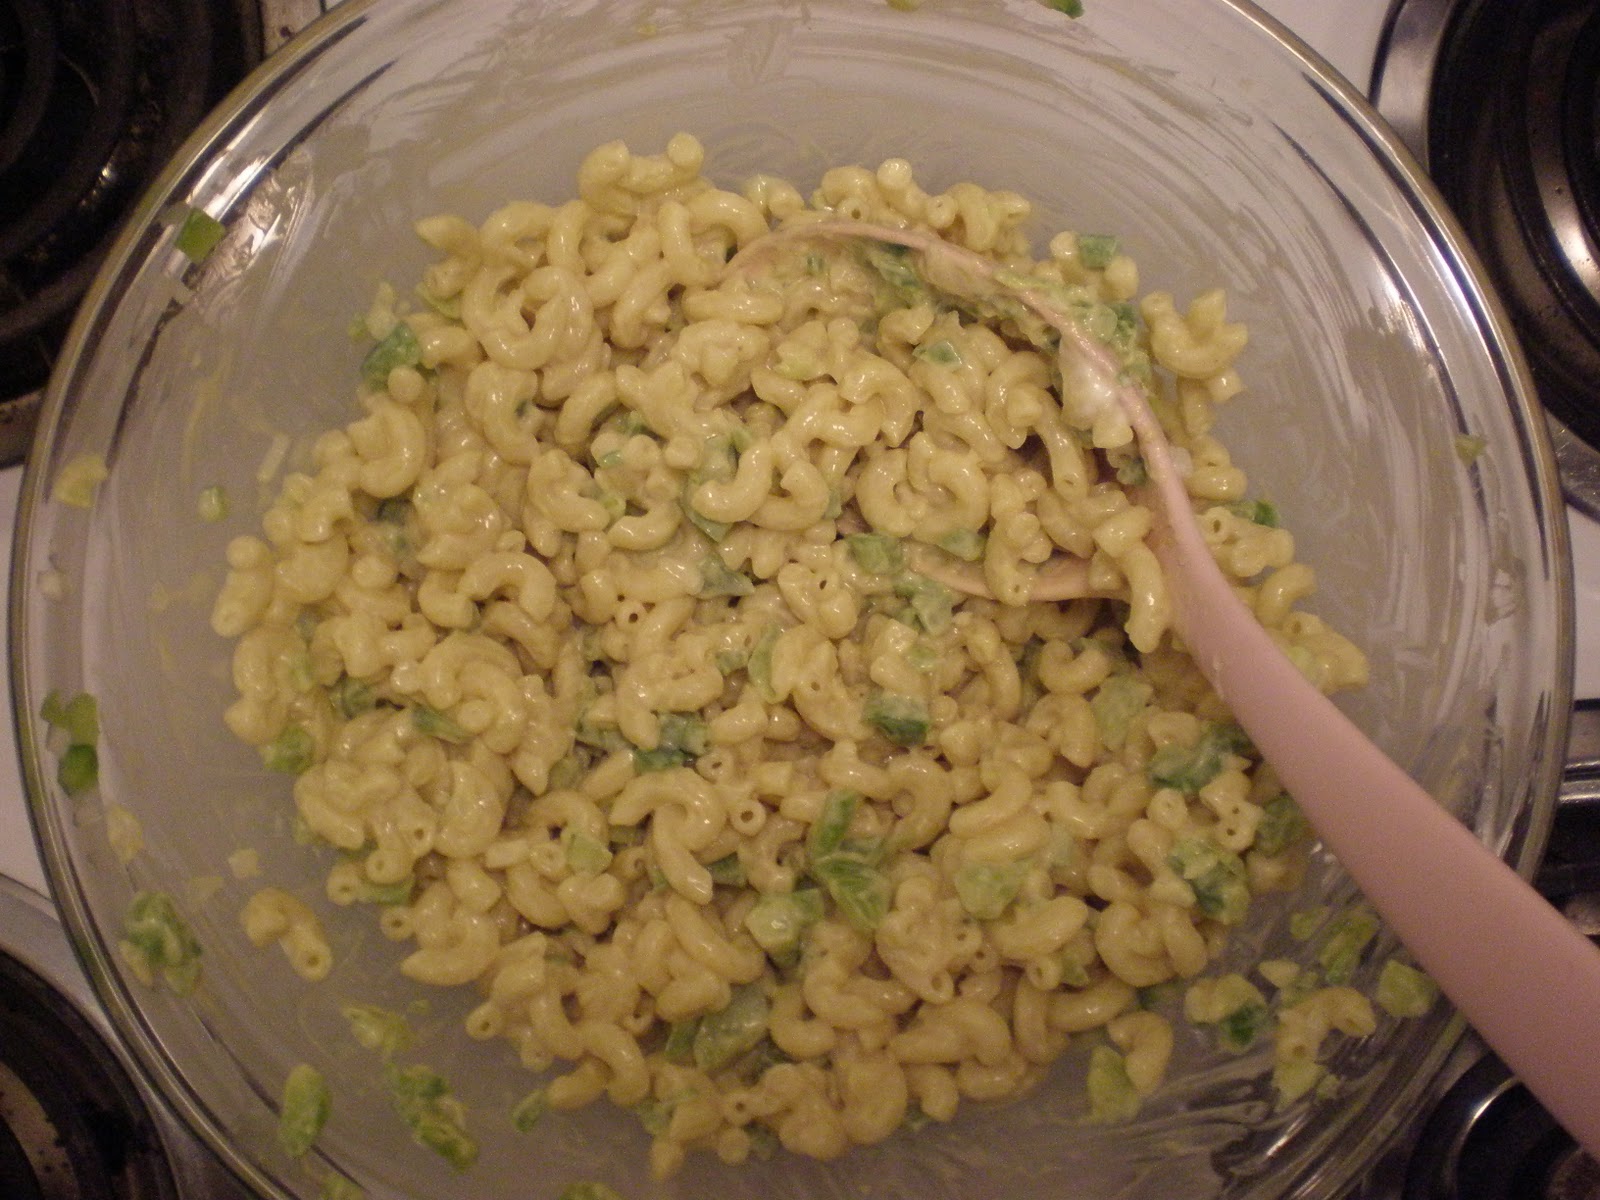
If I had to categorize this macaroni salad and say how it is different from other macaroni salads, I would say that it is that it has Dijon mustard in it. The Dijon gives it a little kick. It is really creamy and has that sound that only creamy macaroni salad can make when you stir it up. You know what I'm talking about.  I hope you all enjoy!

Topinka's Macaroni Salad

1 12 Oz Package of Macaroni
1 Green Pepper
1 Small Onion
1 Small Jar of Pimentos
1 Slice of American Cheese, sliced (more if desired)
3 Tbsp Mayo
1 Tbsp Dijon Mustard
1/2 Cup of Coffee Cream or Milk
Pinch of salt

Prep Time: 15 Minutes
Cook Time: 10 Minutes
Clean Up Time: 10 Minutes

Makes 6 to 10 Servings

1. Cook and drain Macaroni


2. Add chopped Pepper, Onions, and Pimentos. Stir.


3. Stir in Mayo


4. Stir in Mustard and salt


5. Add Cream or Milk.
The more cream or milk, the creamier it will be.


6.  (Not in the Original Recipe) I added shredded carrot


7. Chill for several hours. Add cheese before serving


I hope that you all really enjoy this. I really would love to hear what you all like to add to your macaroni salad to make it your own. I would like to add all of the different variations to this post and hopefully create a long list of how everyone personalizes their own salad. I hope that you all have an excellent day.

One Love,

Virginia


Here is a link to that song I was talking about, Girl I left Behind :)